

Personalized landing pages let you turn ambassador traffic into a more tailored shopping experience. Instead of sending visitors to a generic homepage, you can show them a version of your store that includes the ambassador's details, banner, and messaging, making the experience feel more relevant and conversion-friendly.
How to Set Up Personalized Landing Pages
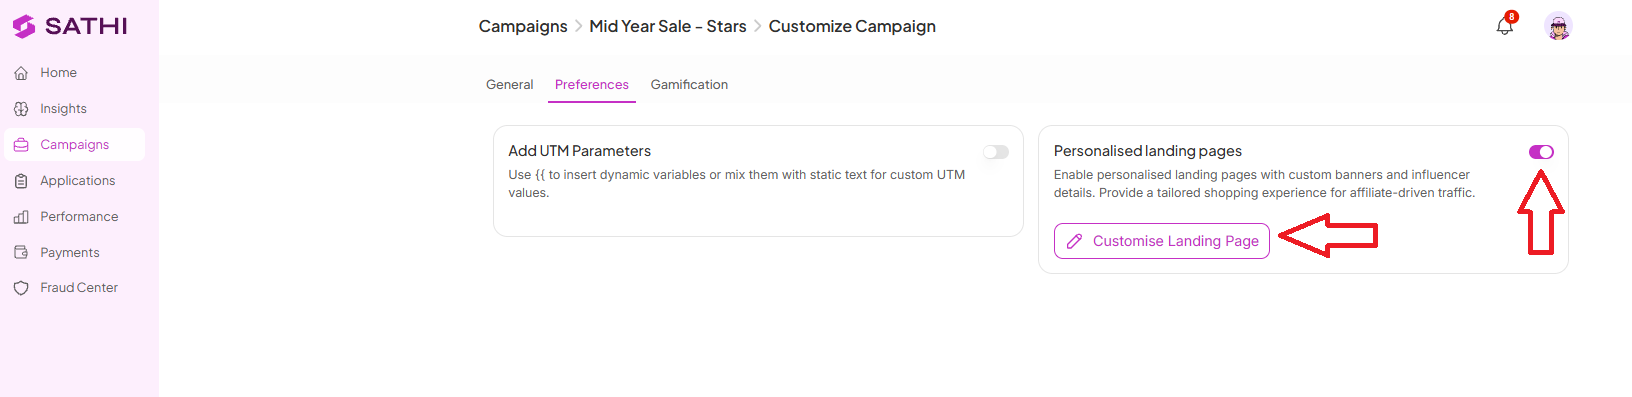
Go to Campaigns
Select the campaign you want to configure (if you have multiple)
Click Customize
Open Preferences
Toggle on Personalised Landing Pages
Click Customize Landing Page to edit the experience
Inside the landing page editor, you can typically adjust:
Banner copy
Messaging shown to their audience
Overall storefront experience for affiliate traffic
What Happens After You Enable It
Once toggled on:
Each ambassador gets a unique, trackable link
When their audience clicks it, they land on a personalized version of your homepage
The page dynamically reflects the ambassador driving the traffic

Why This Is Important
A personalized landing page makes an ambassador's audience feel like they're arriving somewhere built for them, rather than a generic storefront. That added relevance and trust is often the difference between a click that bounces and a click that converts.
Still need help?
Reach out anytime to our Support team using the button at the bottom-right corner of your dashboard, or email us at [email protected].