An application form is a public page where interested people can apply to join your ambassador program. You review who applies and approve who gets in. Here's how to set one up.
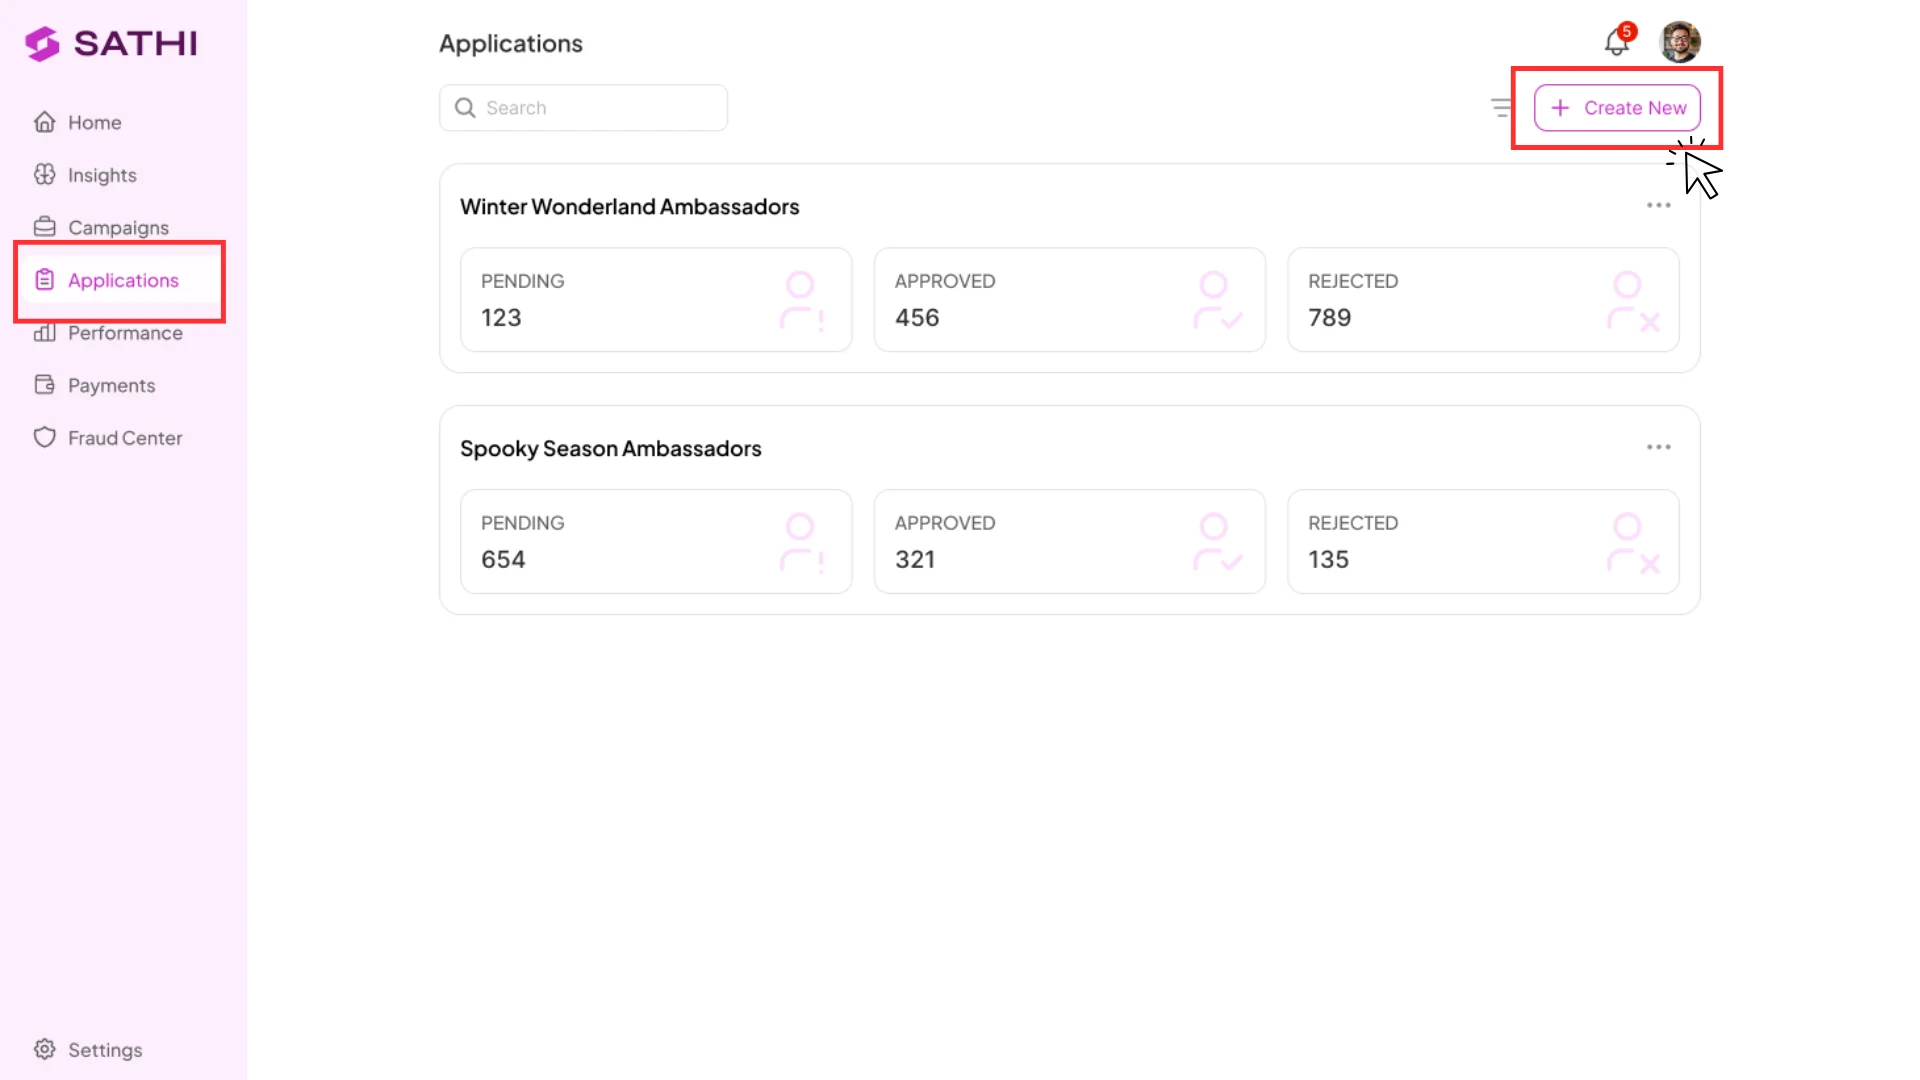
Go to Applications in the left sidebar and click + Create New in the top right.
Fill in:
Form name: Internal, just for you
Campaign: Select which campaign approved ambassadors will be added to
Approve applications with: Choose what gets generated when you approve someone:
Ambassador Link & Discount Code: Both are created automatically
Only Ambassador Link: No discount code
Only Free Product: A product from your Shopify store is sent to the ambassador on approval
Click Continue.
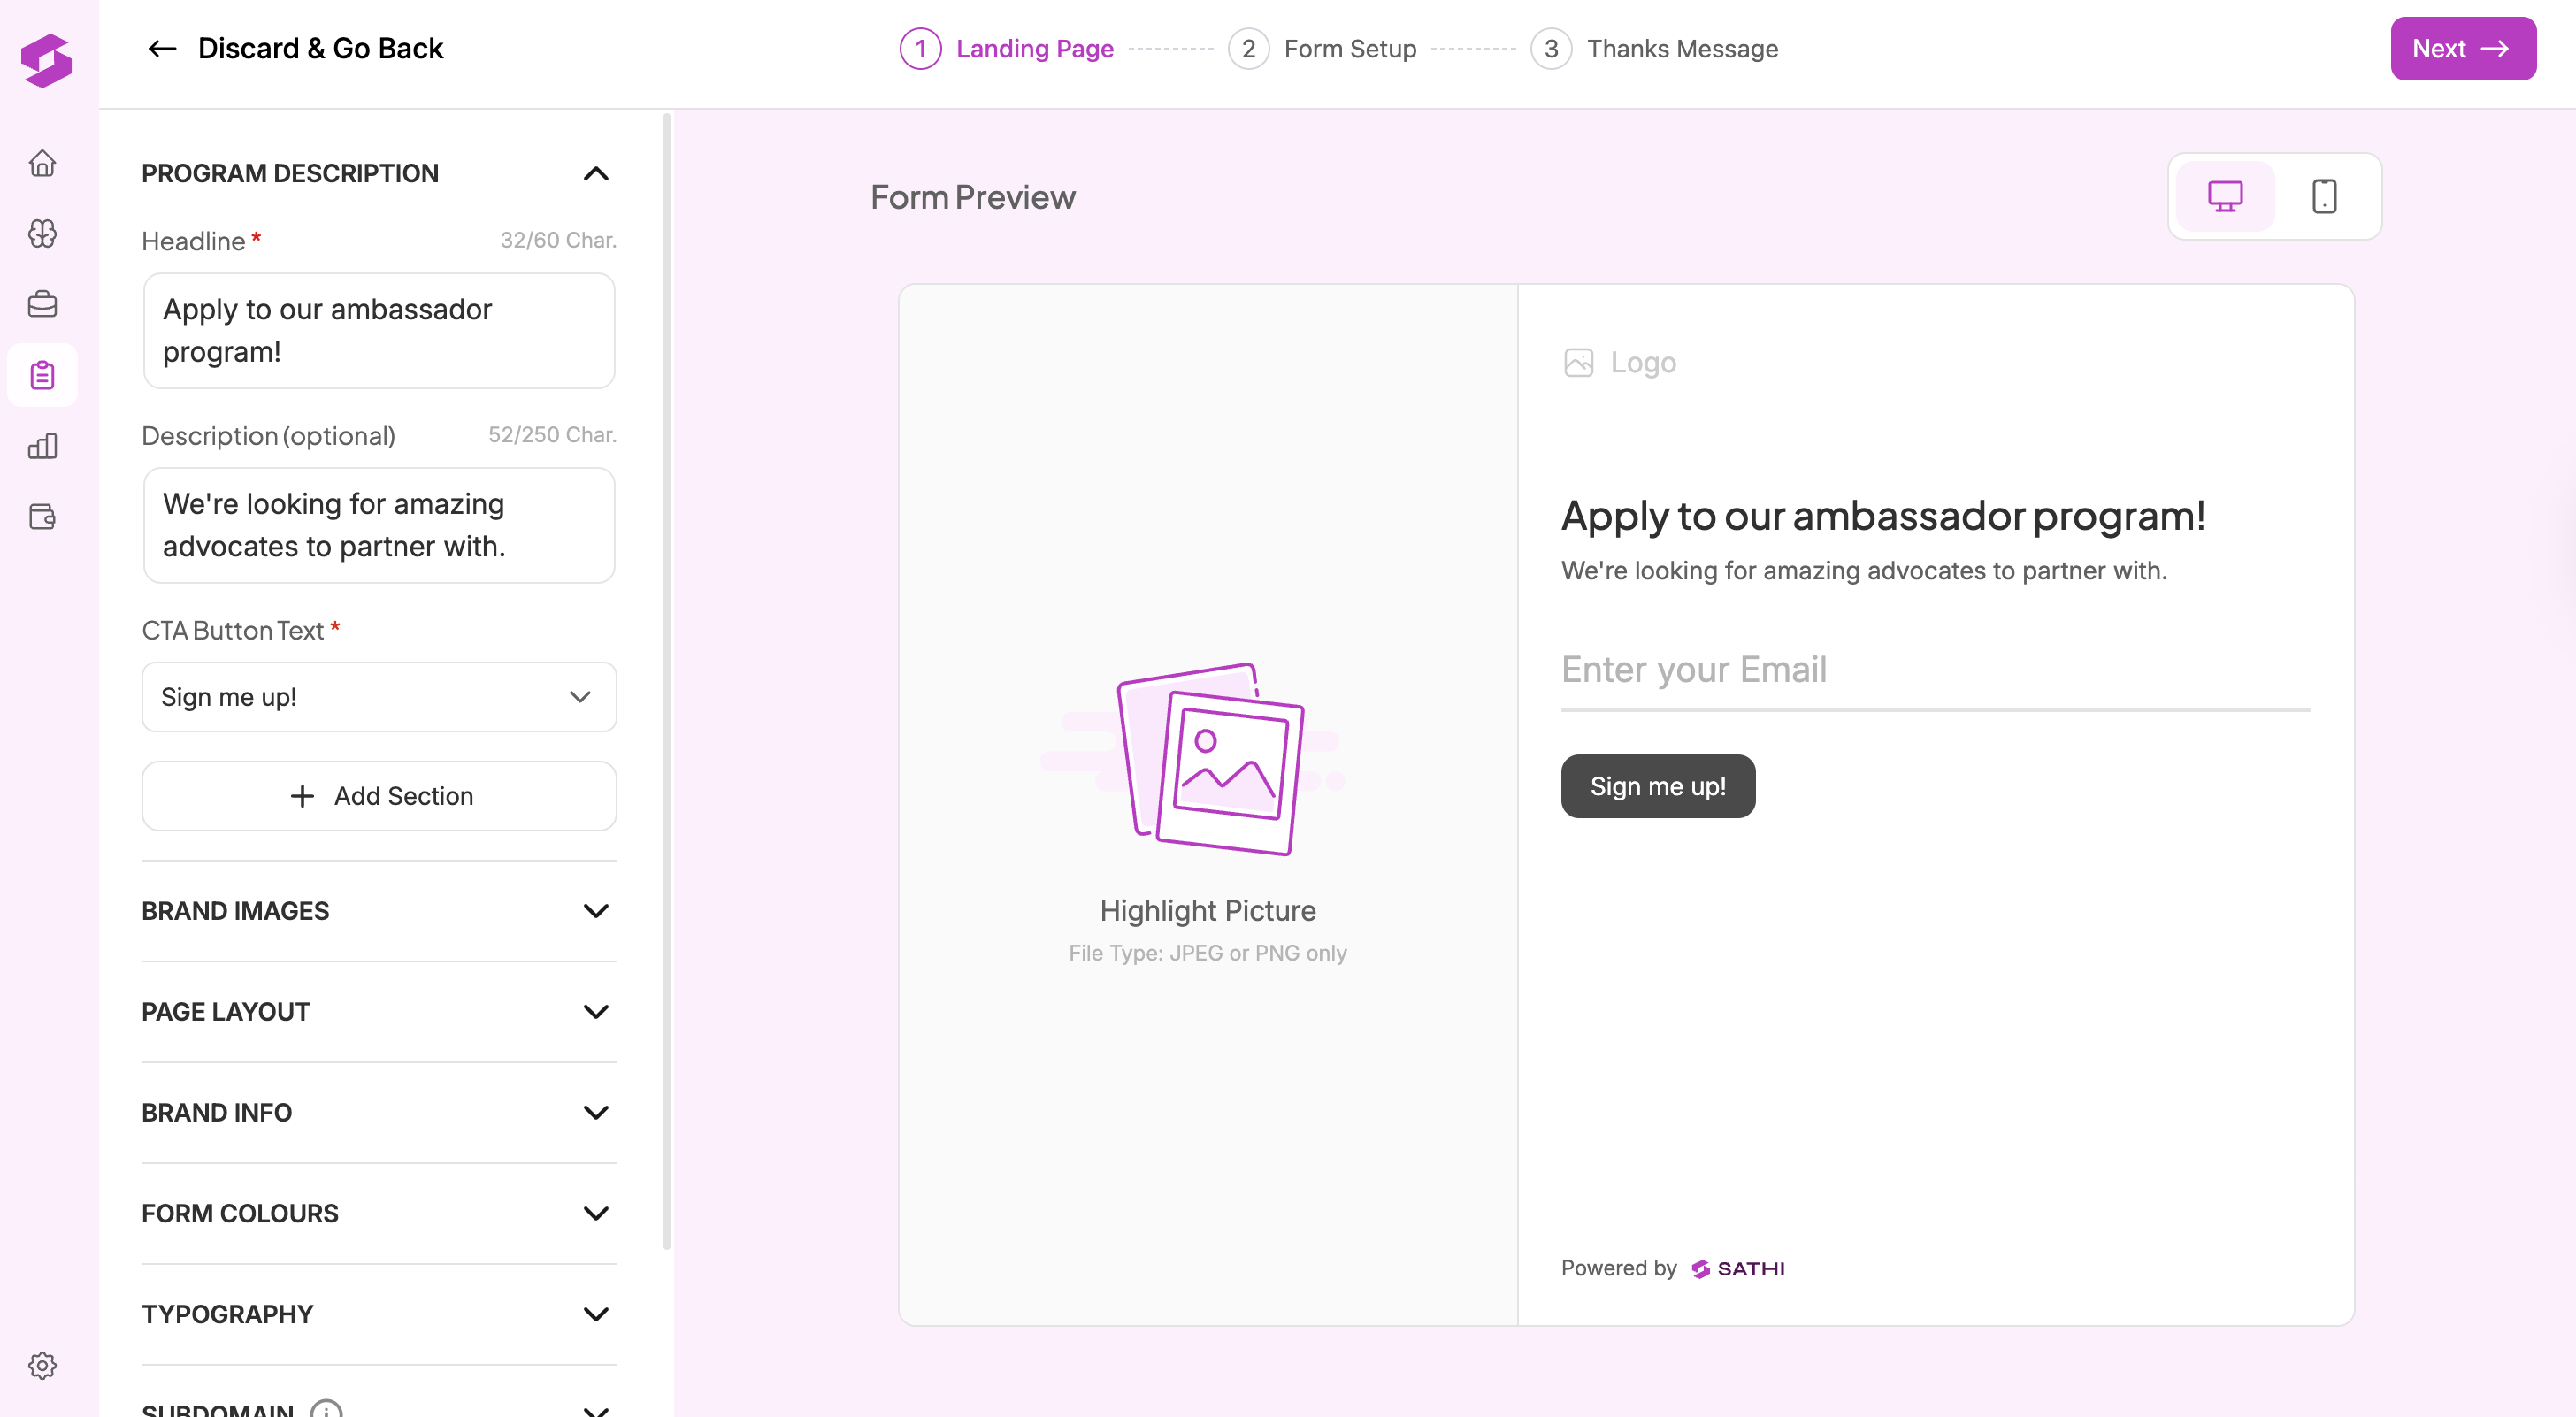
This is the first page applicants see. You can customize everything here, with a live preview updating on the right as you edit.
Program Description
Add a headline and description to tell people what your program is about
Customize the CTA button text (e.g. "Sign me up!", "Apply Now")
Add extra sections if needed
Brand Images
Upload your brand logo
Add a highlight picture (JPEG or PNG)
Add a favicon (optional)
Page Layout
Choose how the form sits on desktop: Left, Right, Top, or Center
Choose mobile layout: Top or Center
Brand Info
Enter your brand name and website
Form Colors & Typography
Customize background, headline, description, and button colors
Select header and body fonts
Subdomain
Set a custom suffix for your form URL
Terms and Conditions
Toggle on if you want applicants to agree to your T&Cs before submitting
Once you're happy with the landing page, click Next.
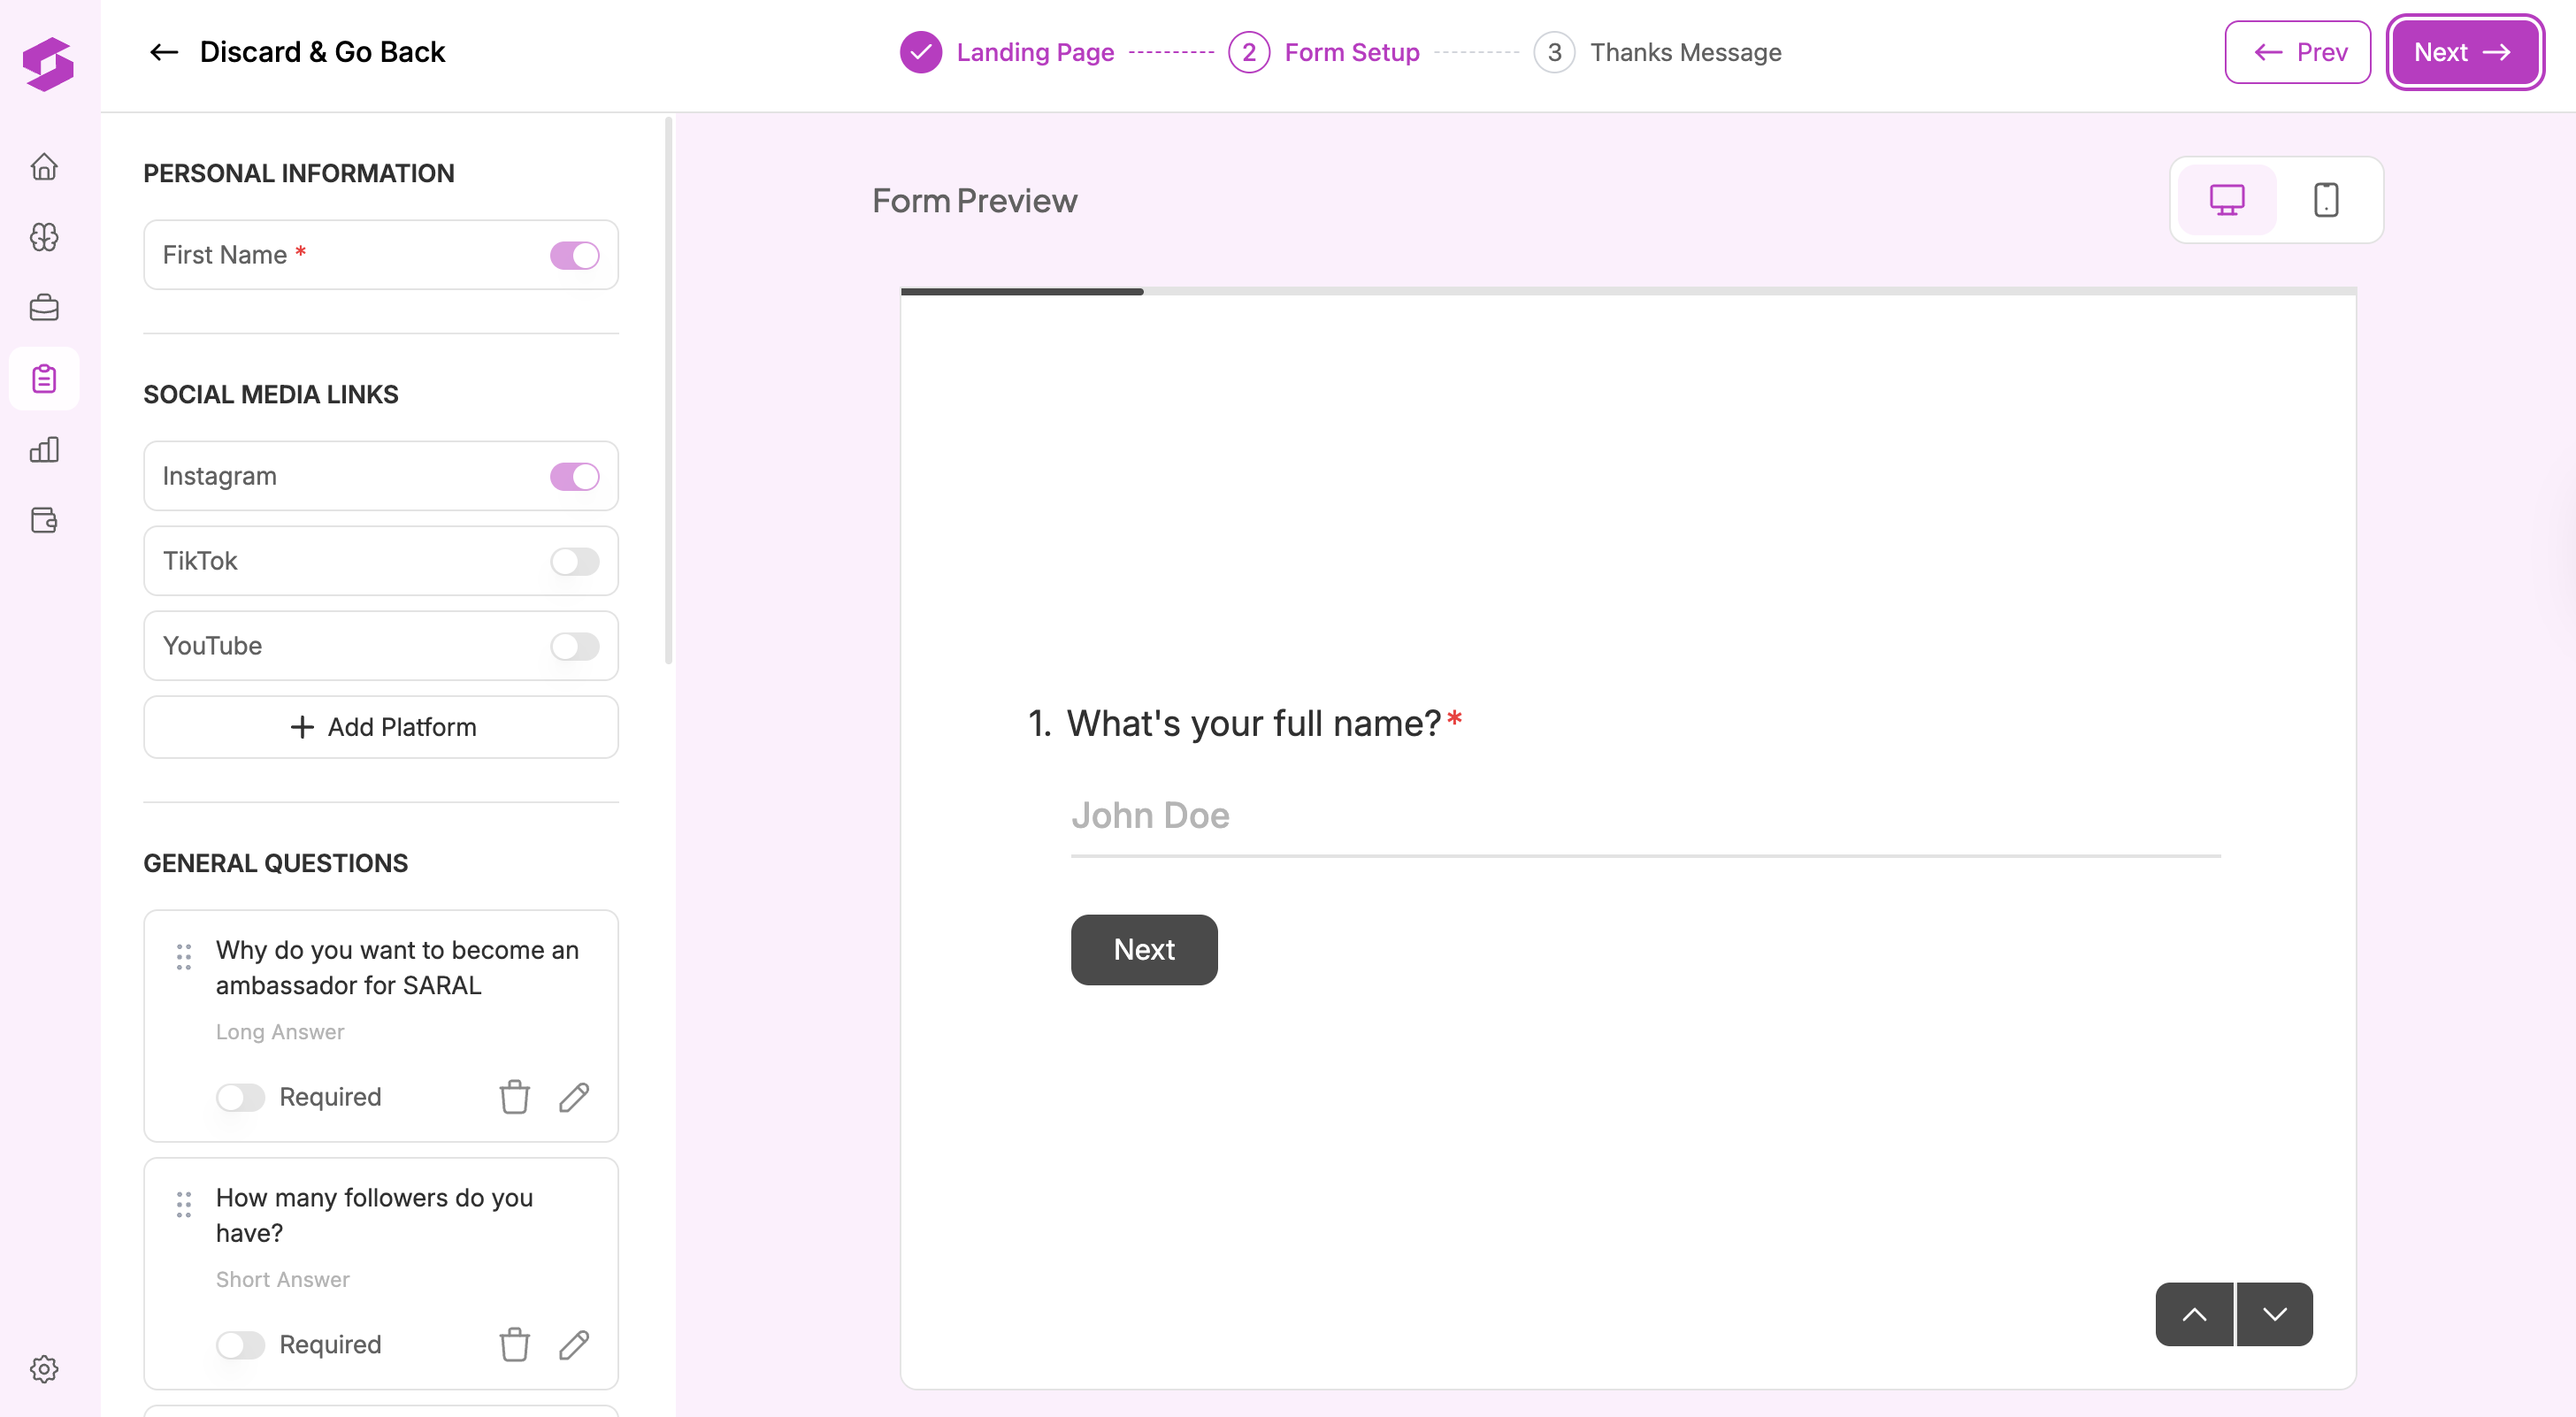
This is where you decide what information you collect from applicants.
Personal Information
Toggle on First Name (on by default)
Social Media Links
Toggle on the platforms you want to collect: Instagram, TikTok, YouTube
Add more platforms with + Add Platform
General Questions
Add custom questions (short answer or long answer)
Mark questions as required or optional
Reorder, edit, or delete questions anytime
Shipping Gift Options (optional)
Toggle on if you want applicants to select a product during application
Choose whether they can select multiple products
Select which products are available
Shipping address is collected automatically when this is enabled
Once done, click Next.
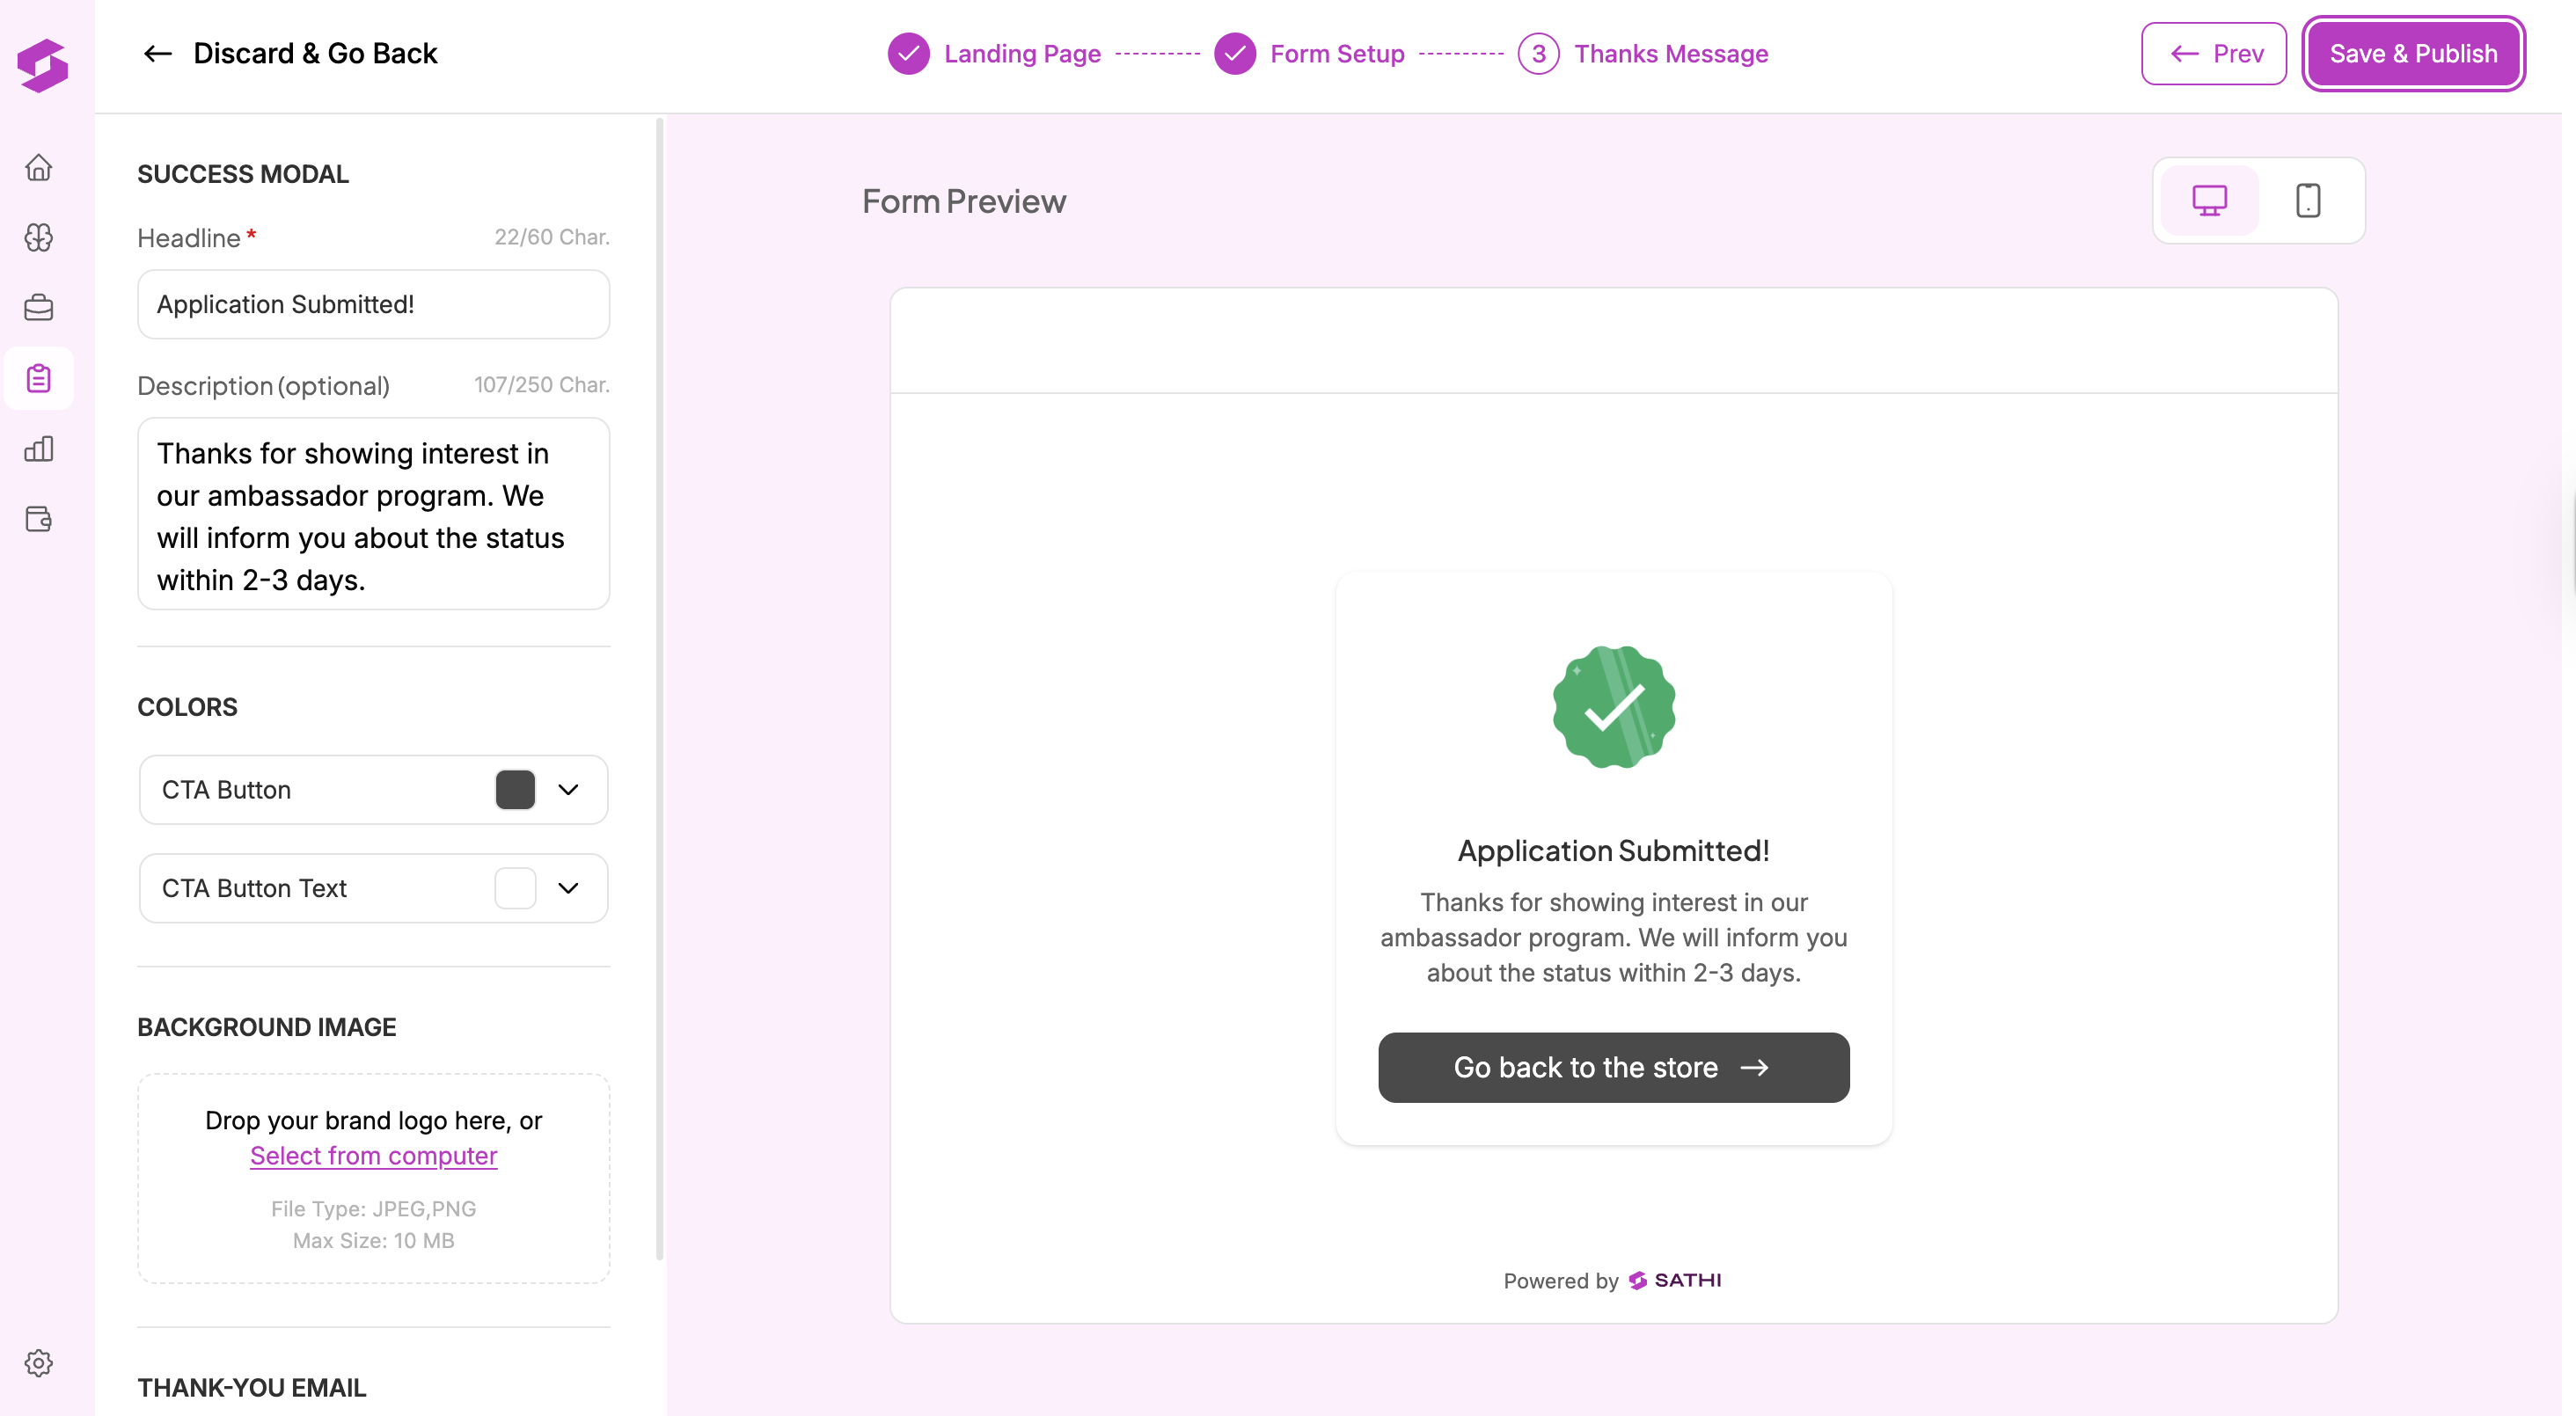
This is what applicants see after they submit their application.
Edit the success headline and description
Customize button colors
Add a background image
Set up a thank-you email if needed
Once you're done, click Save & Publish in the top right.
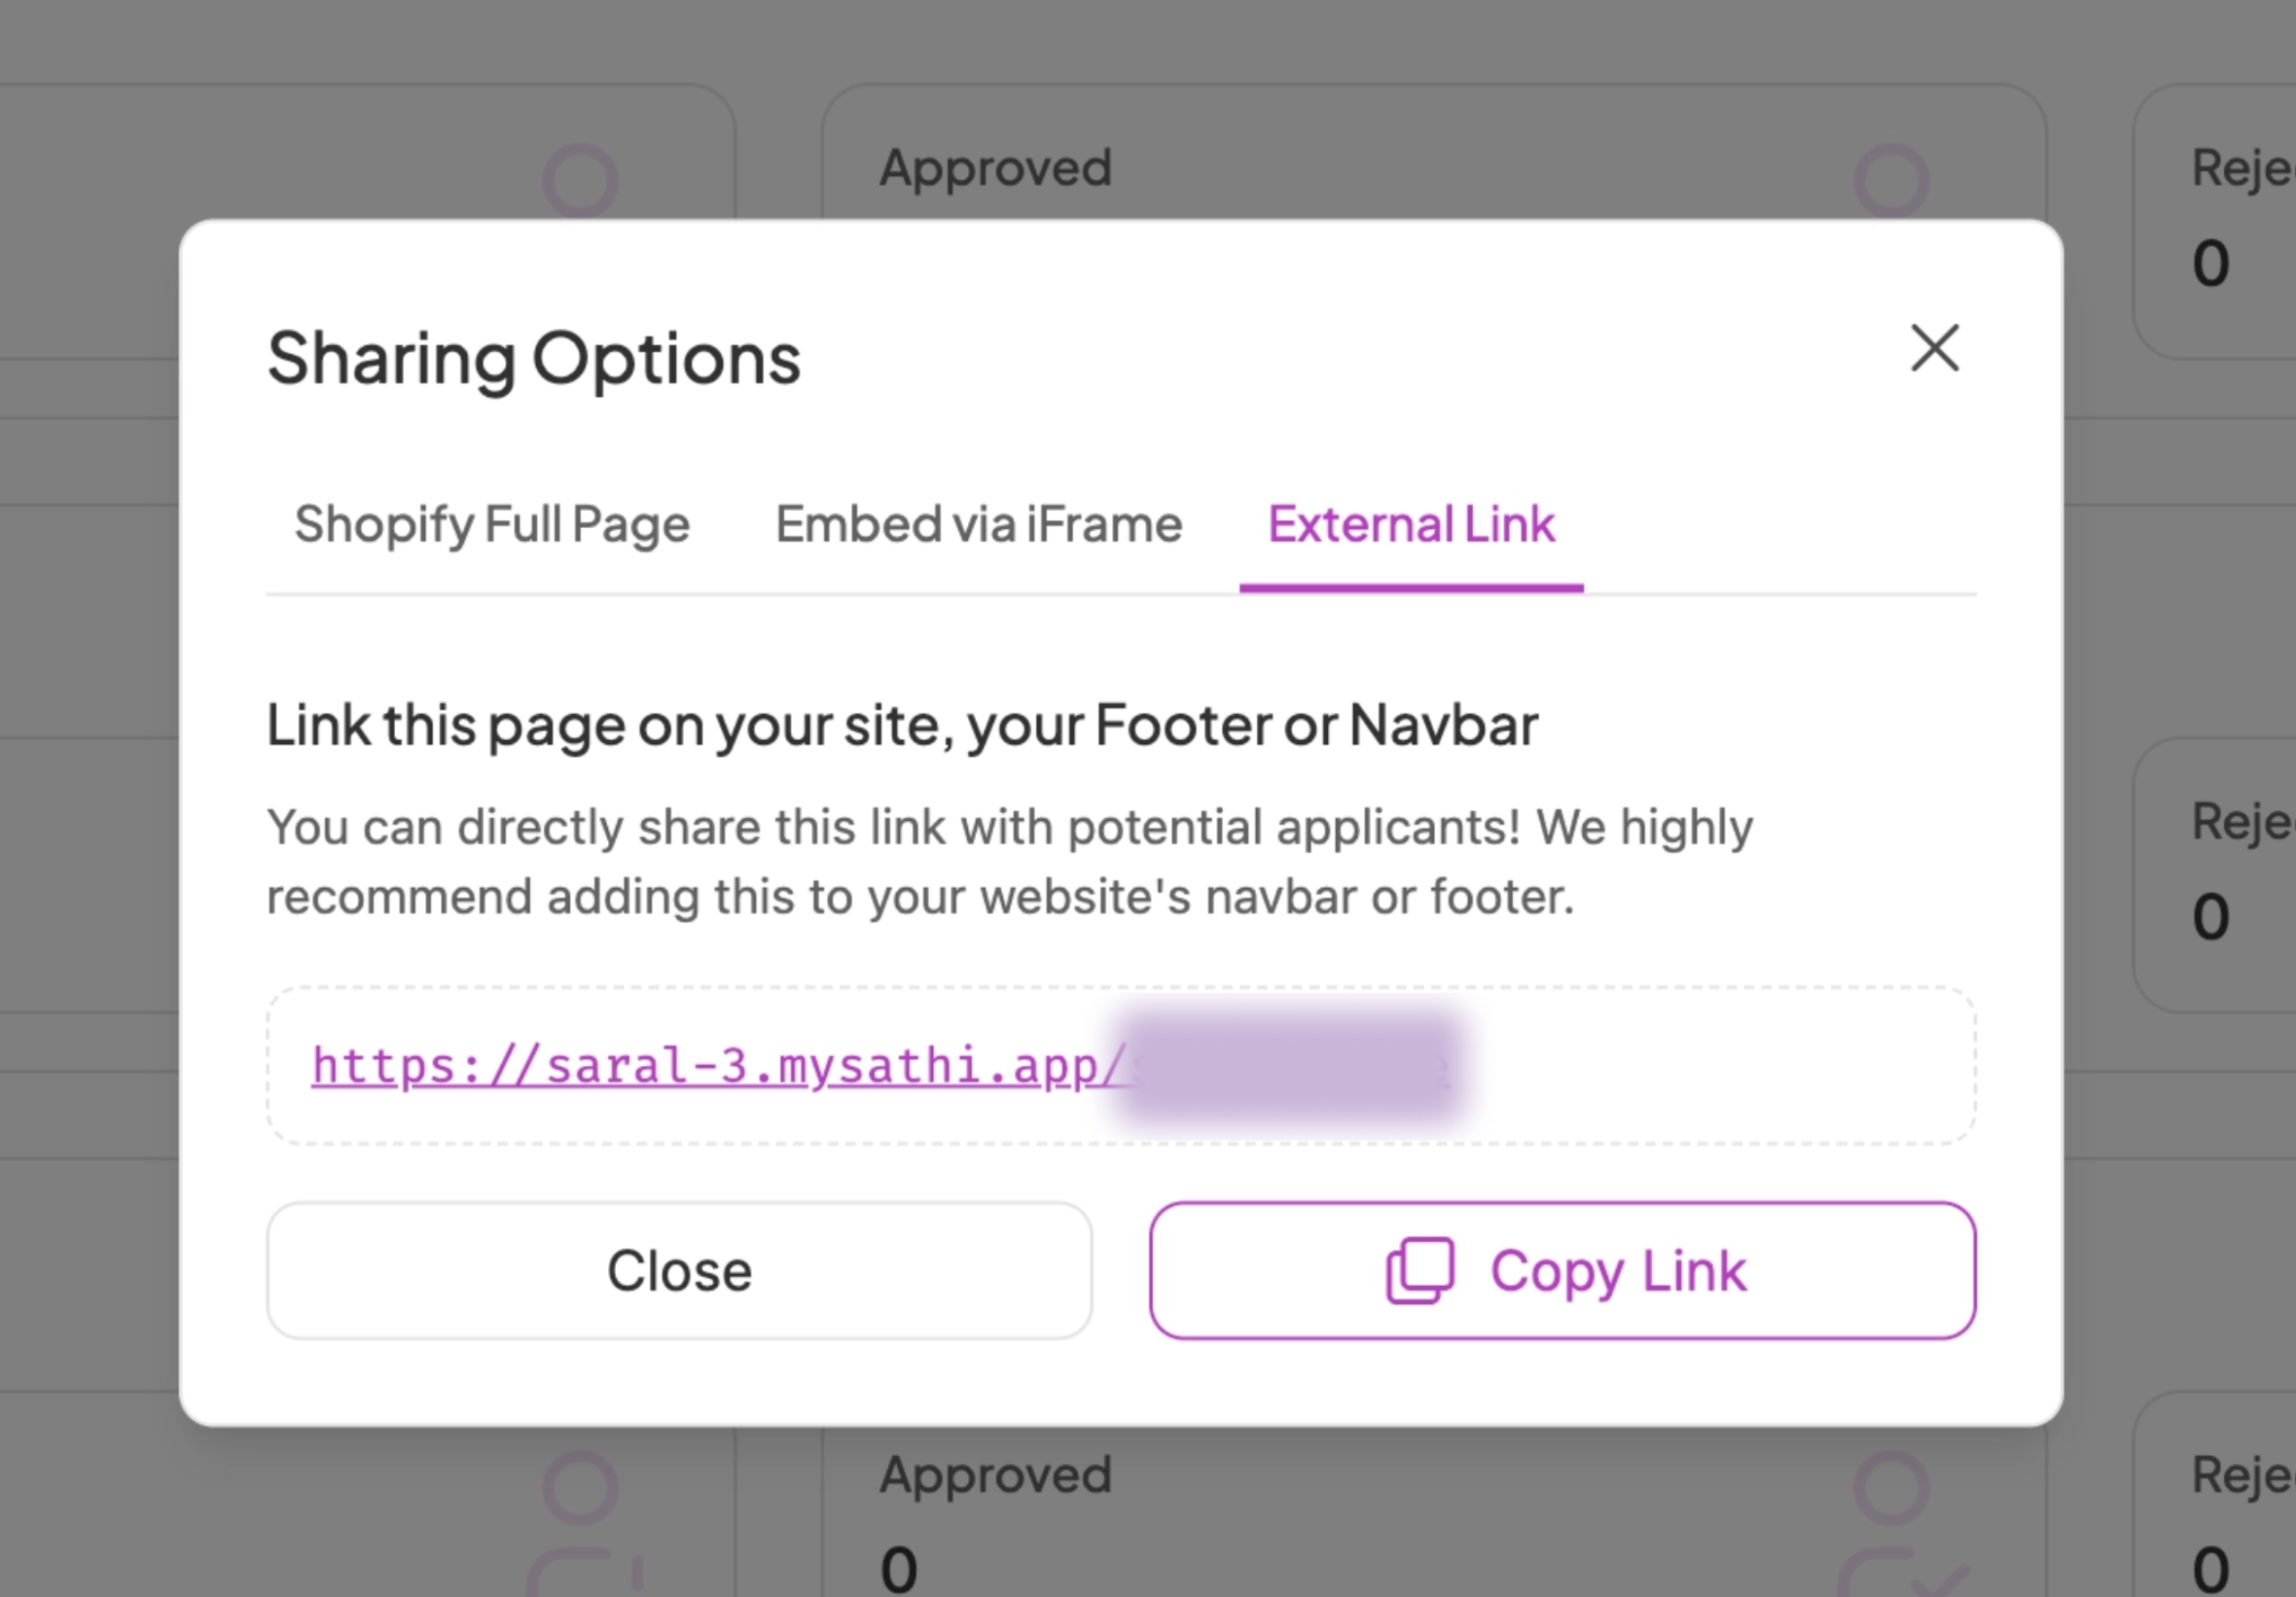
After publishing, SATHI shows you a Sharing Options modal with three ways to add the form:
Shopify Full Page (Recommended): Makes the form a full page on your Shopify store. Click Enable Shopify Form Hosting, then set a short URL suffix for your form. Once enabled, publish directly to your store with one click.
Embed via iFrame: Copy the iFrame code and paste it into any page on your website. Best for embedding the form within an existing page.
External Link: Copy the direct link to your form and share it anywhere: your email list, Instagram bio, TikTok bio, website footer, or navbar.
Applications land in your Applications tab, where you can review and approve or reject them.
Approved Ambassadors are automatically added to the campaign you selected in Step 1. You’ll also see separate tabs to help you keep track of:
Approved — Ambassadors you’ve approved and added to your campaign
Pending — Applicants waiting for your review and approval
Rejected — Applicants you’ve decided not to approve
Incomplete — Applicants who started but didn’t complete their application form
You can personalize application approval templates using custom params. Edit these under Settings → Preferences → Application Approval Templates.
Available params include:
first_name — Applicant's first name.
brand_name — Your brand's name.
your_name — Your name (the person sending the approval).
discount_code — Discount code generated for the ambassador.
affiliate_link — Ambassador's tracking link for their affiliate program.
magic_link — One-click login link for the ambassador's dashboard.
primary_commission — Primary commission tier for the specific campaign.
primary_discount — Discount provided to customers for the specific campaign.
primary_returning_commission — Commission provided for returning customers in the specific campaign.

See the Help Center articles on setting up Milestone Rewards and Gamification.
Without an application form, growing your ambassador program means manually vetting and onboarding every person who reaches out. A public form lets you set your own criteria up front, collect exactly the information you need, and approve applicants directly into a campaign, so growing your program doesn't require one-off manual setup for each new ambassador.
————————————————————————————————————————————
Still need help?
Reach out anytime to our Support team using the button at the bottom-right corner of your dashboard, or email us at [email protected].